Introduction to Arduino Web Server with Ethernet Shield
The Arduino Ethernet Shield is a powerful add-on module that brings network communication capabilities to your Arduino projects. This comprehensive guide walks you through everything you need to know to build a functional web server with Arduino, allowing remote device control and sensor monitoring through any web browser.
What is the Arduino Ethernet Shield?
The Arduino Ethernet Shield enables your Arduino to connect to local networks and the internet via Ethernet cable. Based on the Wiznet W5100 Ethernet chip, it provides a complete network stack supporting both TCP and UDP protocols.
Network Connectivity
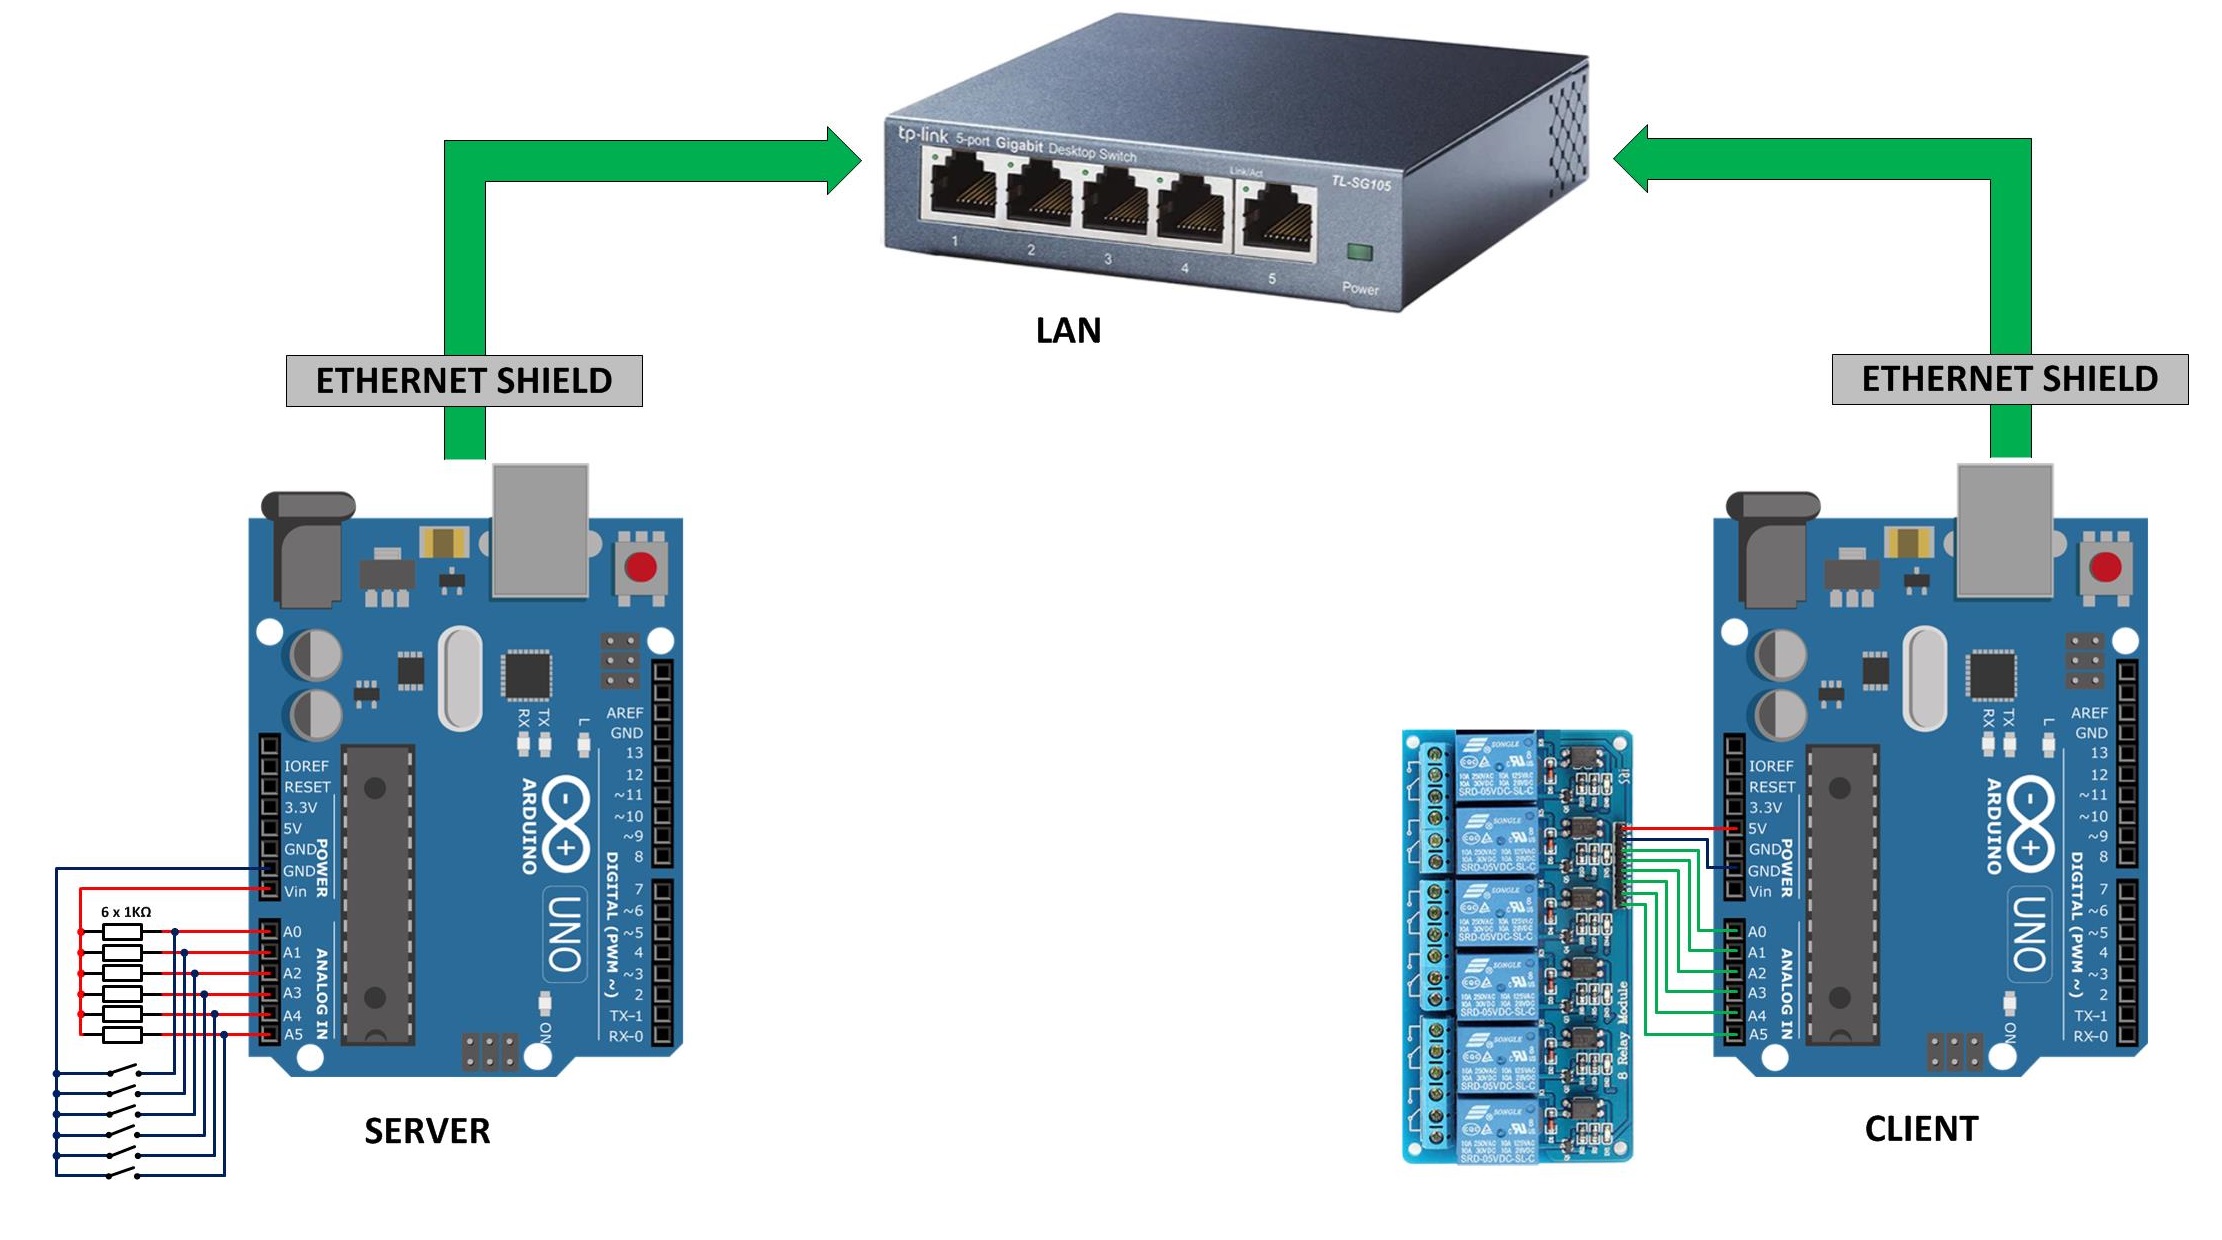
Connect to local networks and the internet via standard RJ45 Ethernet cable, enabling remote access and control.
MicroSD Storage
Built-in microSD card slot for storing web pages, logging data, or serving static content.
PoE Compatibility
Optional Power over Ethernet (PoE) module support for simplified power delivery.
Arduino Integration
Seamless integration with Arduino boards using SPI communication, maintaining access to I/O pins.
Practical Applications
The Arduino Ethernet Shield opens up numerous possibilities for IoT projects:
- Remote Control Systems: Control lights, appliances, and devices from any web browser
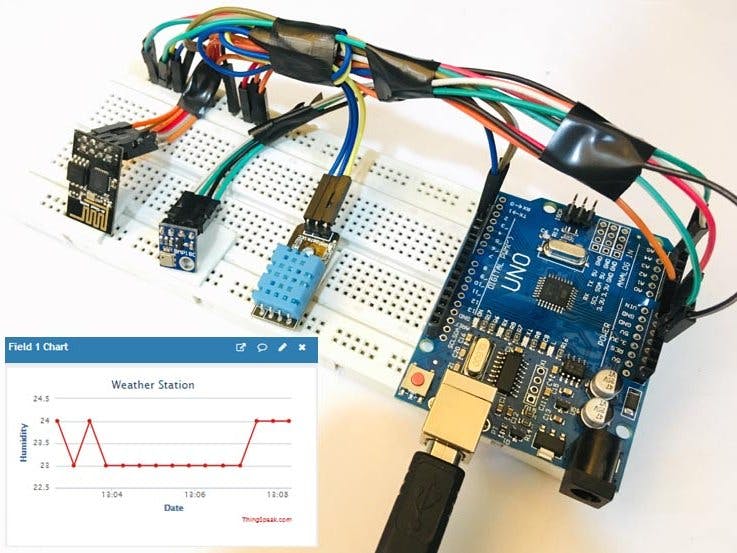
- Sensor Monitoring: View real-time sensor data (temperature, humidity, light levels) remotely
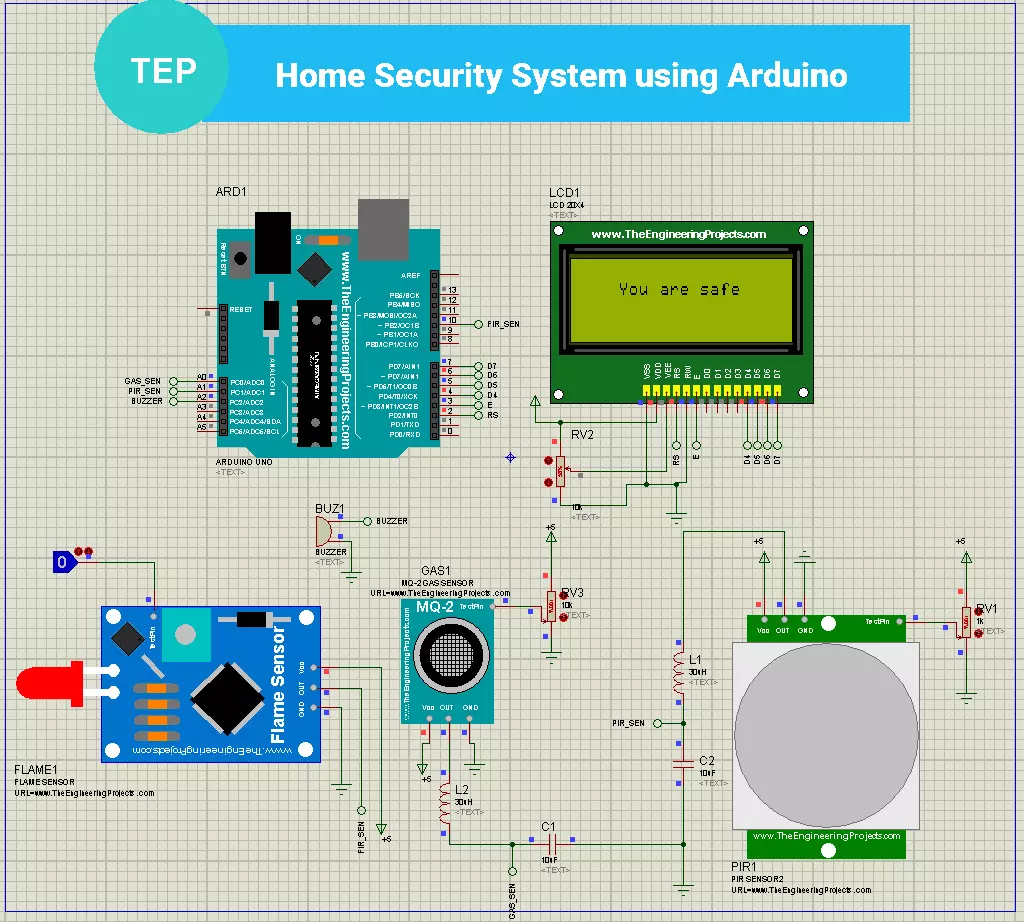
- Home Automation: Create smart home systems accessible from smartphones or computers
- Industrial Monitoring: Remote equipment status monitoring with web-based dashboards
- Data Logging: Collect and display sensor data with timestamped records
Key Features and Specifications
Ethernet Controller
Wiznet W5100 TCP/IP embedded Ethernet controller with internal 16K buffer
Network Protocols
Supports TCP, UDP, ICMP, IPv4 ARP, IGMP, PPPoE protocols
Power Requirements
Powered from Arduino board or external supply; PoE module optional
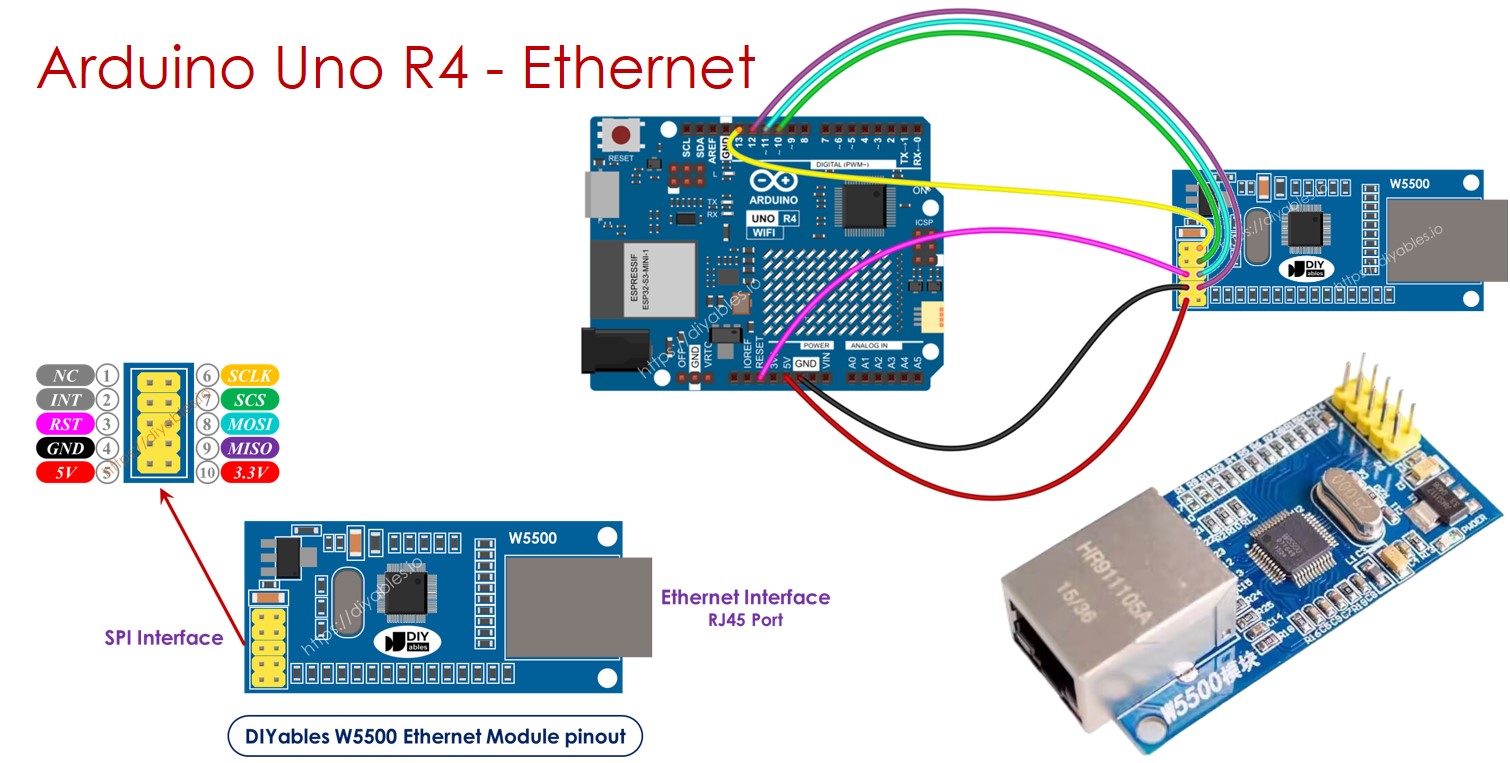
Communication
SPI interface to Arduino with speeds up to 15 Mbps
Hardware Setup Requirements
1 Required Components
Before building your Arduino web server, gather these essential components:
- Arduino Board: Uno, Mega, or compatible board
- Ethernet Shield: Official Arduino or compatible shield
- Ethernet Cable: Standard RJ45 cable for network connection
- Power Supply: 9V adapter for continuous operation (USB works for testing)
- Additional Components: LEDs, resistors, pushbuttons, potentiometer for demonstration
2 Hardware Assembly
Proper hardware setup is crucial for reliable operation:
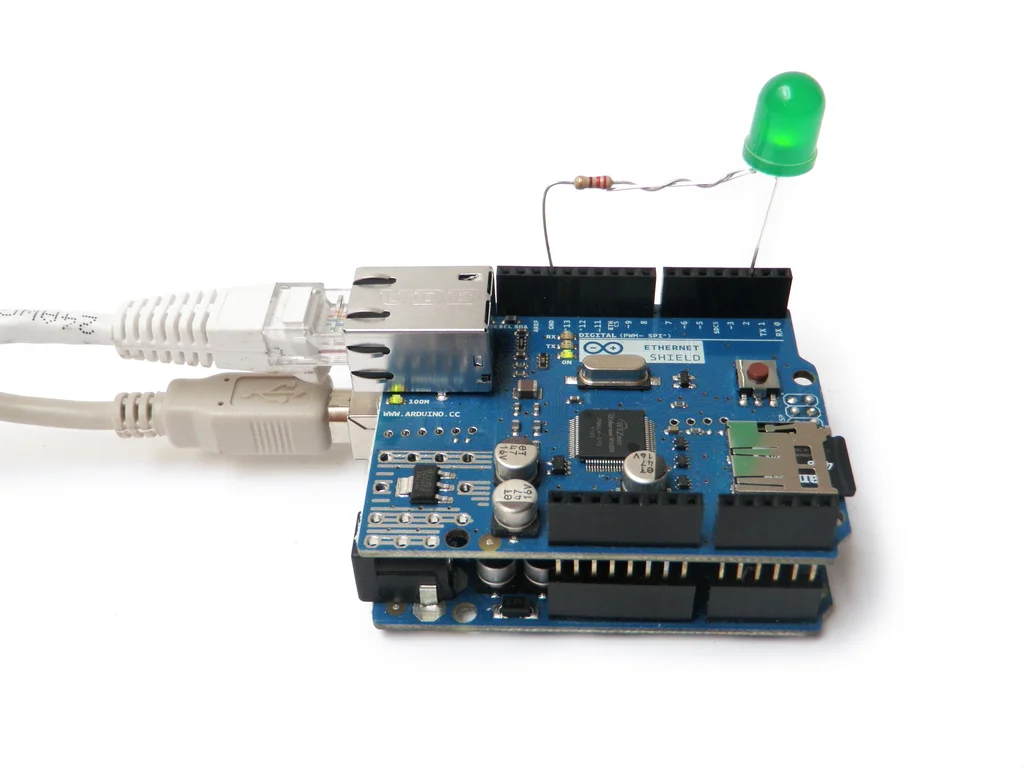
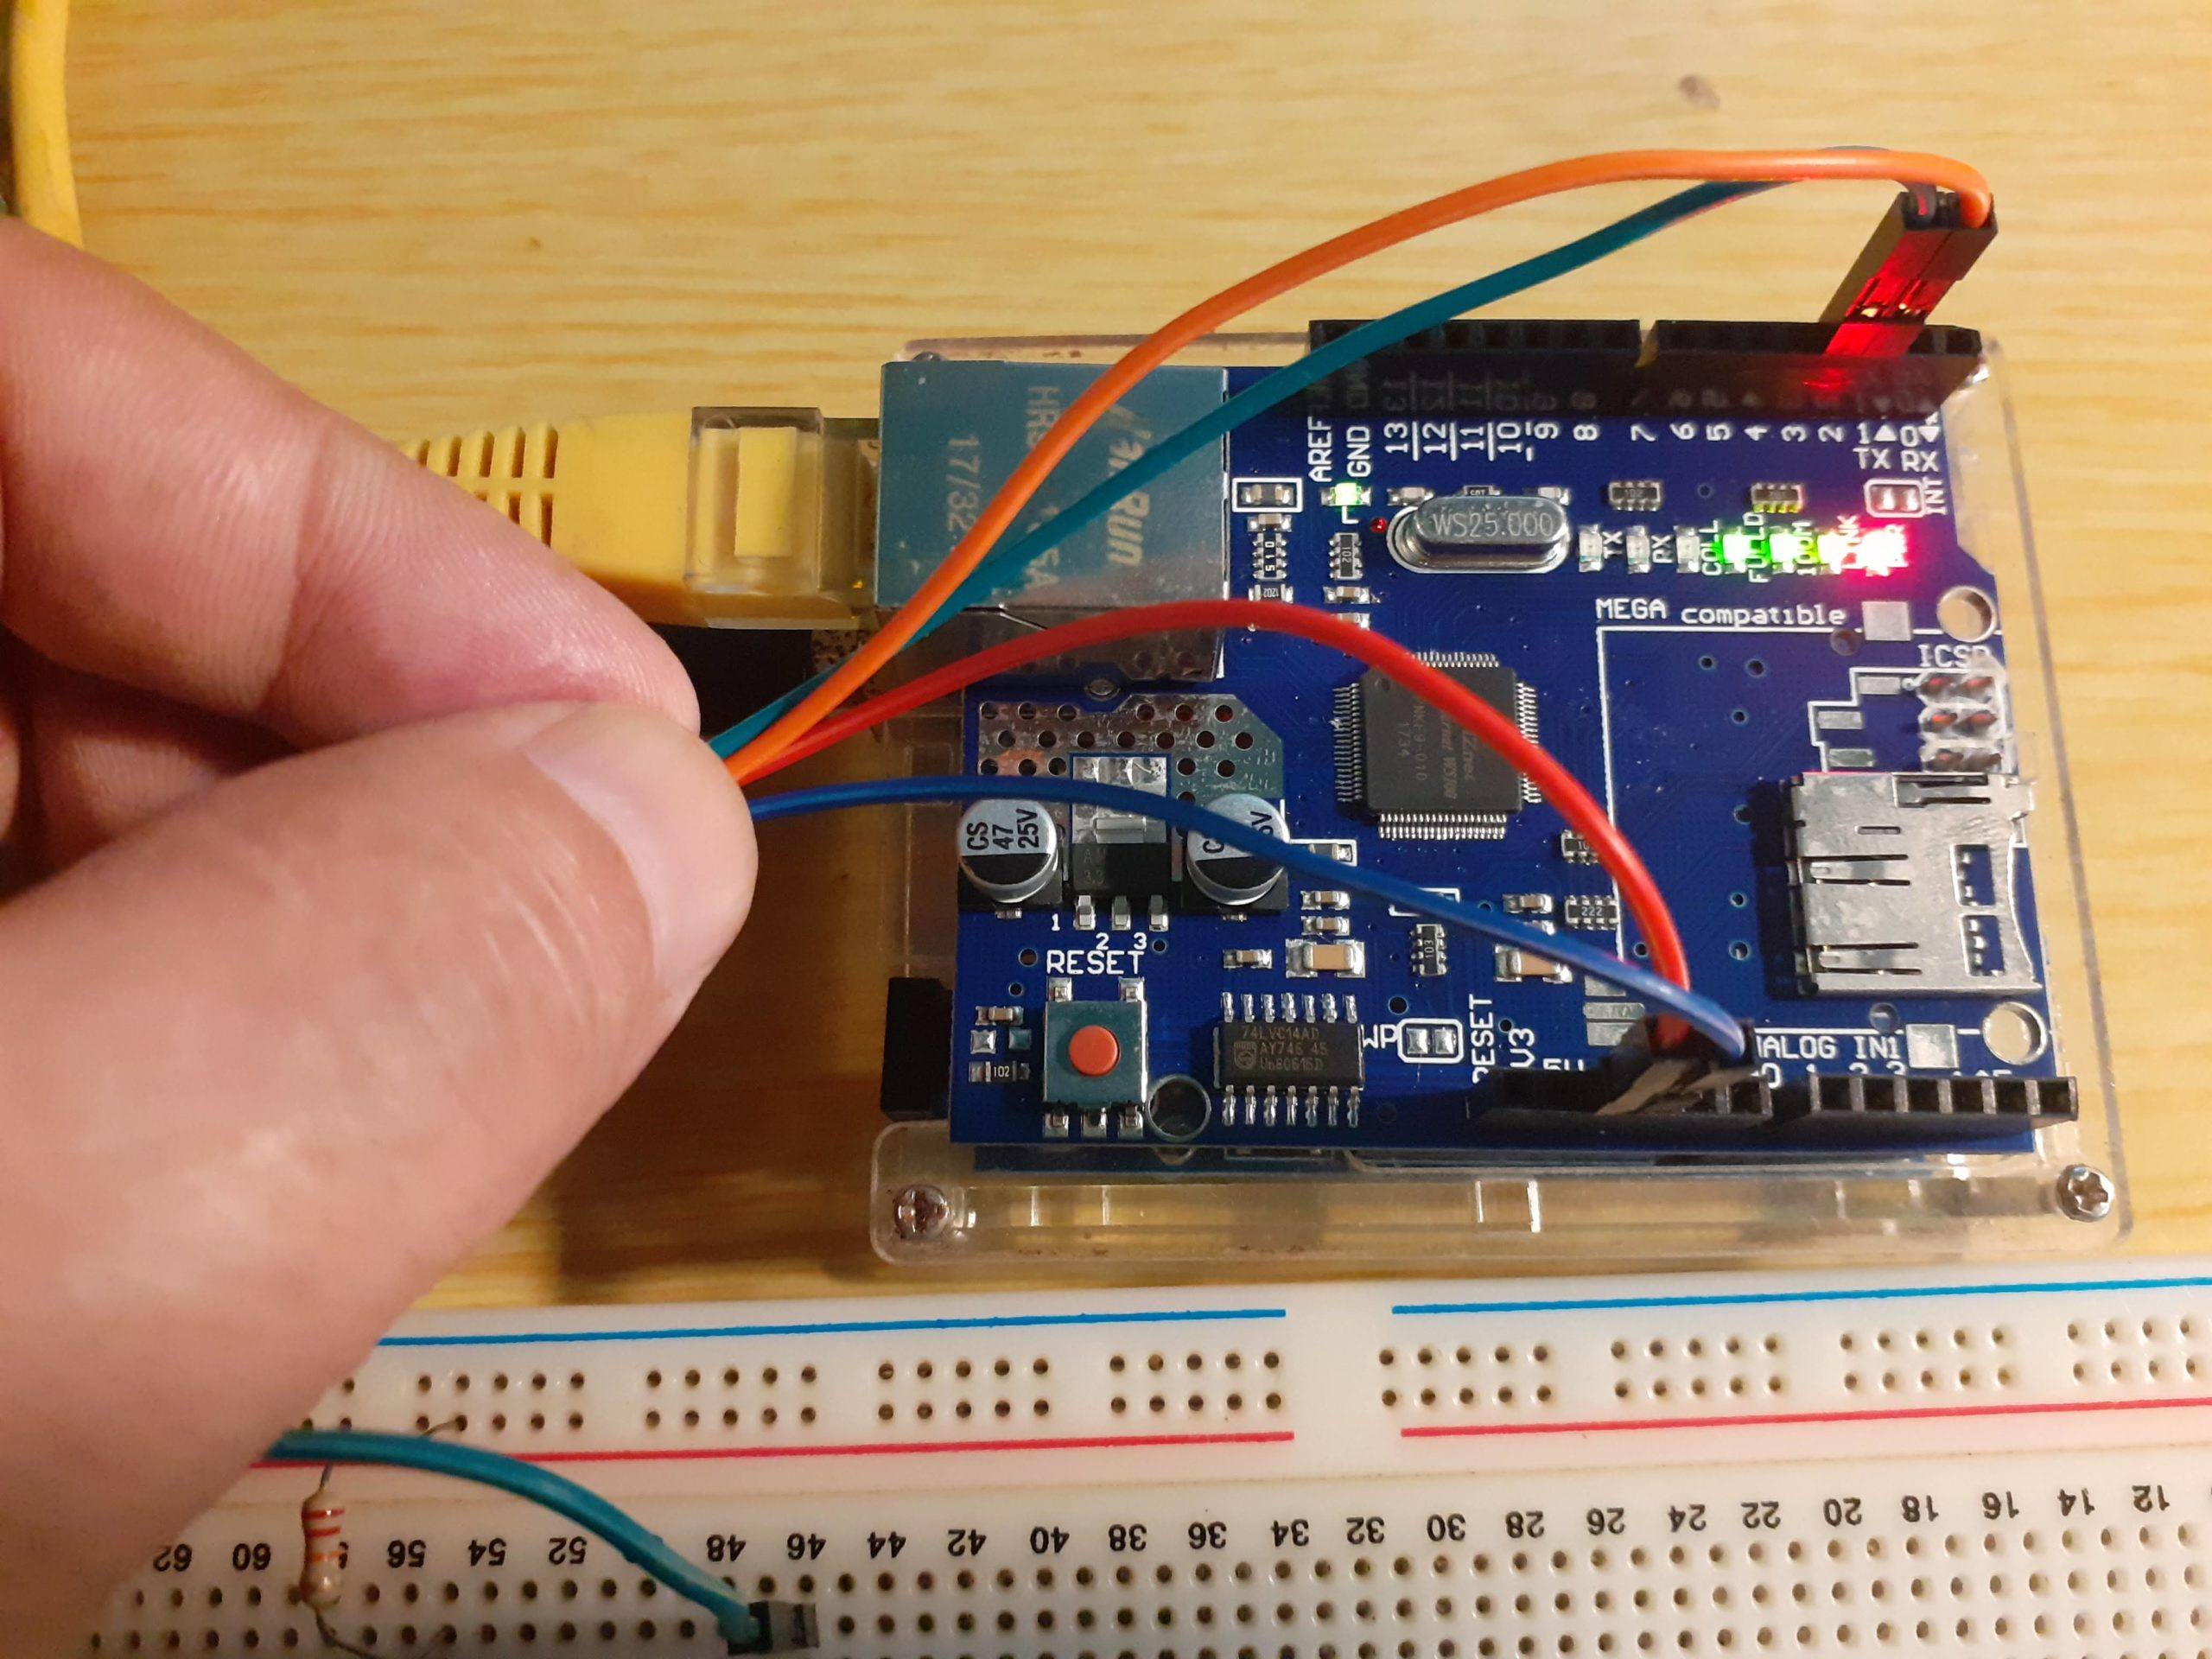
- Mount Shield: Carefully align and press Ethernet Shield onto Arduino pins
- Connect Network: Plug Ethernet cable into shield and router/switch
- Add LEDs: Connect LEDs to pins 8 and 9 with 220-ohm resistors to ground
- Add Button: Connect pushbutton to pin 7 with pull-down resistor
- Add Potentiometer: Connect middle pin to A0, outer pins to 5V and GND
Network Configuration
3 IP Address Setup
Your Arduino web server needs proper network configuration:
| Method | Description | When to Use |
|---|---|---|
| DHCP | Automatic IP assignment from router | Testing, dynamic networks, easiest setup |
| Static IP | Manually assigned fixed IP address | Production systems, port forwarding, reliable access |
| Link Local | Automatic IP in 169.254.x.x range | Direct connections without router |
For most projects, start with DHCP for testing, then switch to static IP for production.
Complete Arduino Web Server Code
4 Basic Web Server Implementation
Here's the complete code for a functional Arduino web server:
#include <SPI.h>
#include <Ethernet.h>

// Network configuration
byte mac[] = { 0xDE, 0xAD, 0xBE, 0xEF, 0xFE, 0xED };
IPAddress ip(192, 168, 1, 177); // Static IP (optional)
EthernetServer server(80); // Port 80 for HTTP

// Pin definitions
const int ledPin9 = 9;
const int ledPin8 = 8;
const int buttonPin = 7;
const int potPin = A0;

String request; // Store HTTP request

void setup() {
  Serial.begin(9600);

  // Initialize pins
  pinMode(ledPin9, OUTPUT);
  pinMode(ledPin8, OUTPUT);
  pinMode(buttonPin, INPUT);

  // Start Ethernet with DHCP
  if (Ethernet.begin(mac) == 0) {
    Serial.println("DHCP failed, using static IP");
    Ethernet.begin(mac, ip);
  }

  server.begin();
  Serial.print("Server IP: ");
  Serial.println(Ethernet.localIP());
}

void loop() {
  EthernetClient client = server.available();

  if (client) {
    request = "";

    while (client.connected()) {
      if (client.available()) {
        char c = client.read();
        request += c;

        if (c == '\n') {
          // Send HTTP headers
          client.println("HTTP/1.1 200 OK");
          client.println("Content-Type: text/html");
          client.println("Connection: close");
          client.println();

          // Send HTML content
          client.println("<!DOCTYPE HTML>");
          client.println("<html><head><title>Arduino Web Server</title></head>");
          client.println("<body><h1>Arduino Web Server</h1>");

          // Process control requests
          if (request.indexOf("GET /9/on") >= 0) digitalWrite(ledPin9, HIGH);
          if (request.indexOf("GET /9/off") >= 0) digitalWrite(ledPin9, LOW);
          if (request.indexOf("GET /8/on") >= 0) digitalWrite(ledPin8, HIGH);
          if (request.indexOf("GET /8/off") >= 0) digitalWrite(ledPin8, LOW);

          // Control interface
          client.println("<h2>LED Control</h2>");
          client.println("<p>Pin 9: <a href='/9/on'>ON</a> <a href='/9/off'>OFF</a></p>");
          client.println("<p>Pin 8: <a href='/8/on'>ON</a> <a href='/8/off'>OFF</a></p>");

          // Sensor readings
          client.println("<h2>Sensor Data</h2>");
          client.print("<p>Button: ");
          client.print(digitalRead(buttonPin) ? "PRESSED" : "NOT PRESSED");
          client.println("</p>");

          client.print("<p>Potentiometer: ");
          client.print(analogRead(potPin));
          client.println("</p>");

          client.println("</body></html>");
          break;
        }
      }
    }

    delay(10);
    client.stop();
  }
}
Code Explanation: This code creates a web server that serves an HTML page with LED controls and sensor readings. The Arduino processes HTTP requests to turn LEDs on/off and displays real-time button and potentiometer values.
Testing Your Web Server
5 Step-by-Step Testing Procedure
Follow these steps to test your Arduino web server:
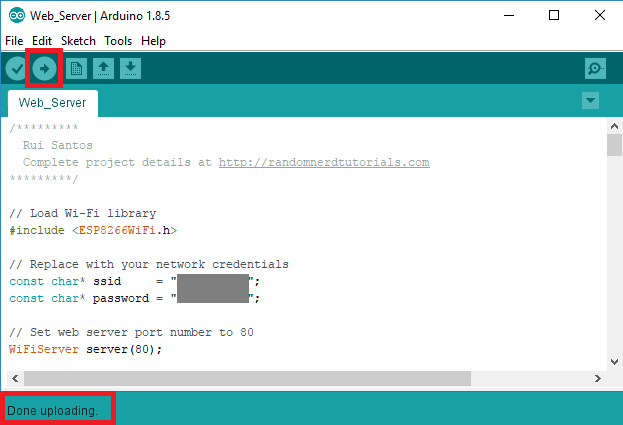
- Upload Code: Connect Arduino via USB, select correct board/port, upload code
- Check Serial Monitor: Open Serial Monitor at 9600 baud to see assigned IP address
- Connect to Network: Ensure Ethernet cable connects shield to router
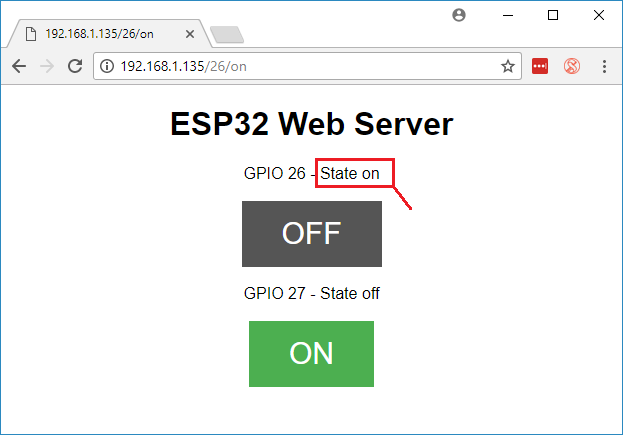
- Access Web Interface: Open browser, enter Arduino's IP address
- Test Controls: Click ON/OFF links to control LEDs
- Verify Updates: Refresh page to see updated sensor readings
Advanced Features
6 Enhancing Your Web Server
Take your web server to the next level with these enhancements:
AJAX Updates
Implement JavaScript for real-time updates without page refreshes
SD Card Storage
Store HTML pages, CSS, and JavaScript files on microSD card
Data Logging
Log sensor data to SD card with timestamps for analysis
Security
Add basic authentication or HTTPS for secure access
AJAX Implementation Example:
// JavaScript for real-time updates
function updateSensors() {
  fetch('/sensors')
    .then(response => response.text())
    .then(data => {
      document.getElementById('sensorData').innerHTML = data;
    });
}
setInterval(updateSensors, 2000); // Update every 2 seconds
Troubleshooting Common Issues
No IP Address
Solution: Check Ethernet cable, router power, try static IP, verify MAC address.
Can't Access Web Page
Solution: Check firewall settings, verify IP address, ensure same network.
Unstable Operation
Solution: Use external power supply, check for sketch memory issues.
Code Compilation Errors
Solution: Install Ethernet library, check Arduino IDE version.
Real-World Project Ideas
Apply your web server skills to these practical projects:
- Smart Home Controller: Control lights, appliances, and HVAC via web interface
- Environmental Monitor: Web-accessible weather station with temperature, humidity, pressure
- Security System: Motion-activated cameras with web-based monitoring
- Plant Watering System: Automated irrigation with soil moisture monitoring
- Energy Monitor: Track electricity usage with real-time web display